

TL;DR:
- Versatile stamps like clear photopolymer, rubber, and embossing stamps are essential for hobbyists to create varied craft projects. Proper tools, including matching acrylic blocks, anti-static powders, and magnifying loupes, extend stamp life and improve results. Series-based stamp sets and layout planning help hobbyists develop consistent, professional-looking designs easily.
Rubber stamping is a craft where your tools define your results. The must-have stamps for hobbyists are those that combine versatility, unique design potential, and ease of use across multiple project types. Whether you are building a scrapbook, creating handmade cards, or designing personalised packaging, the right stamp collection makes every session more productive and more satisfying. This guide covers the ten essential stamp types and tools that belong in every hobbyist’s kit, from clear photopolymer sets to embossing supplies and practical accessories that protect your investment.
1. What are the must-have stamps every hobbyist needs?
Clear photopolymer stamps are the single most versatile type for hobbyists. They cling naturally to acrylic blocks without adhesive, and their transparency lets you place images and sentiments with precision before pressing. That visibility is particularly useful when layering designs or aligning text on a card front.
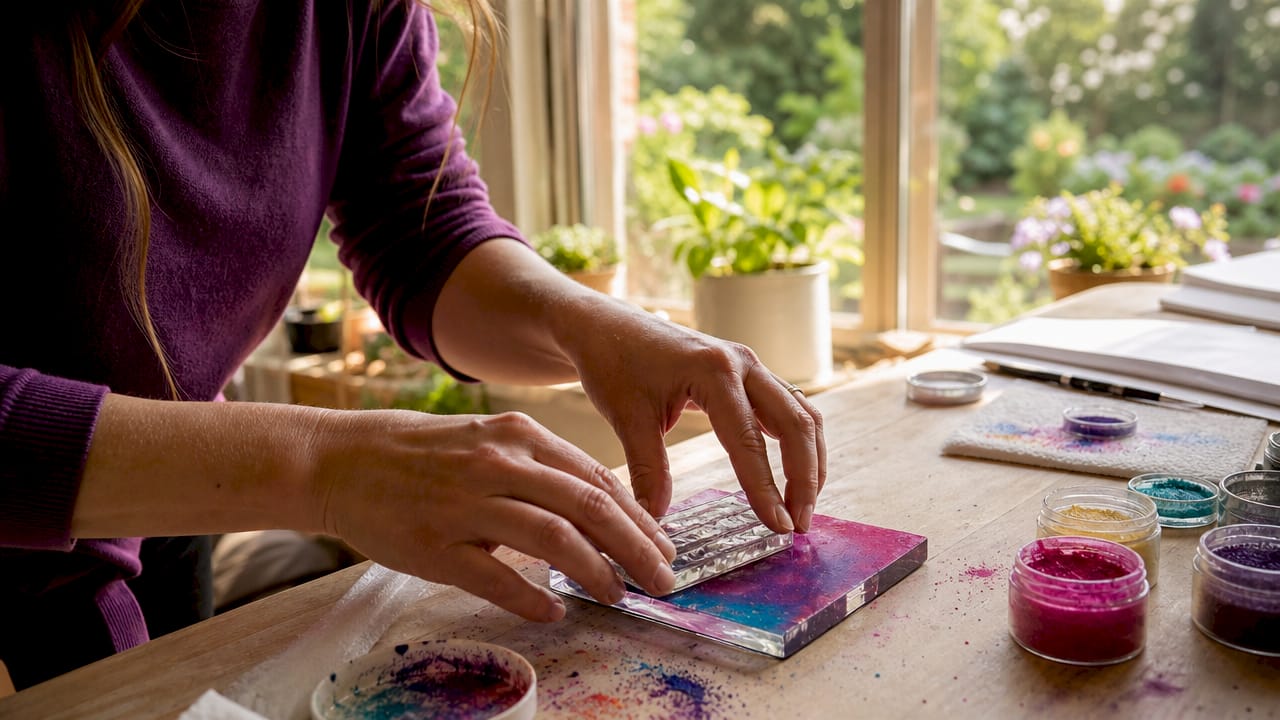
Classic rubber stamps are the second pillar of any solid collection. They are durable, hold fine detail well, and work with a wide range of ink types. Rubber stamps suit hobbyists who stamp frequently and need a type that withstands repeated use without degrading.
Embossing stamps round out the core three. Paired with embossing powder and a heat tool, they produce raised, dimensional effects that no flat ink impression can replicate. Embossing transforms a simple sentiment into a focal point.
2. Clear photopolymer stamps: why they lead every starter kit
Photopolymer stamps’ transparency allows precise placement and easier sentiment alignment, which is the main reason they appear in virtually every beginner kit recommendation. You can see exactly where the image will land before you commit to the impression. That removes the guesswork that frustrates new stampers.
The key to getting clean results with clear stamps is matching your acrylic block to the stamp size. Matching block sizes distributes pressure evenly, reducing misalignment and incomplete impressions. A block that is too large makes it harder to feel where the edges are; one that is too small leaves the stamp unsupported.
Pro Tip: Buy a set of three or four acrylic blocks in different sizes rather than one large block. You will get better control across small sentiment stamps and larger background designs alike.
- Clear photopolymer stamps for precision and layering
- Acrylic blocks sized to each stamp for even pressure
- Dye ink pads for smooth, vibrant backgrounds
- Anti-static tool to prevent stray embossing powder
- Stamp tongs to handle stamps without transferring oils
3. Which unique stamp designs inspire the best creative layouts?
Small stamps are the most underrated design tool in rubber stamping. Three layout methods turn individual motifs into complete compositions: frames, grids, and larger focal shapes. A single leaf stamp, repeated around a card’s perimeter, creates a polished border that looks deliberate and professional.
Thematic stamp sets inspired by nature, postal art, or seasonal motifs give hobbyists a ready-made visual language. Each stamp in the set shares a style, scale, and weight, so combining them produces cohesive results without design experience. You can find creative stamping techniques across postal art, botanical, and geometric themes that translate directly into card and scrapbook layouts.
Treat small stamps as building blocks rather than isolated motifs. That shift in thinking is what separates hobbyists who produce one-off cards from those who develop a recognisable style.
- Frame layouts. Stamp small motifs around the card’s edge to create a natural border. Florals, leaves, and geometric icons all work well.
- Grid patterns. Arrange identical or complementary stamps in rows and columns for a structured, repeatable background.
- Focal shapes. Group small stamps to form a larger shape, such as a wreath or heart, using the negative space between them as part of the design.
- Repeat pattern batching. Stamp one motif across multiple cards in a single session before moving to the next. This speeds up batch crafting and keeps layouts consistent.
- Layered sentiments. Combine a background texture stamp with a clear sentiment stamp on top. The two layers add depth without requiring complex technique.
Designing your repeat patterns for cohesion before you begin a session reduces randomness and produces layouts that look considered. Sketch the arrangement lightly in pencil first, then stamp over it.
4. How to use embossing stamps and powders for professional effects
Heat embossing follows a three-step workflow: apply a sticky ink such as VersaMark, sprinkle embossing powder over the wet impression, then apply heat until the powder turns glossy. Using an anti-static tool before you stamp prevents stray powder from clinging to the card surface outside the design. That single step eliminates the most common embossing complaint among beginners.
Heating technique matters as much as the powder itself. Preheat your heat tool for a few seconds and apply heat from underneath the cardstock rather than directly above the powder. This reduces warping and distributes heat more evenly across the design.
Stop heating when the powder turns glossy. Over-embossing burns the powder and dulls the finish. The glossy signal is reliable and consistent across powder types and colours.
For a guide covering every embossing stamp format in detail, the types of embossing stamps resource from Stampdesign4u covers the practical differences between dry, heat, and sanding embossing methods.
Pro Tip: White embossing powder on dark card stock produces the most dramatic contrast. It is the fastest way to make a handmade card look expensive with minimal effort.
5. Dye ink bundles: the overlooked essential for background stamping
Dye inks are water-based, high-viscosity inks that allow smooth layered stamping and ink blending. They produce vibrant, consistent colour across large background stamps and blend well when two shades are applied to the same pad. Hobbyists who work with floral or botanical stamps find dye inks particularly effective because the colours remain true even after layering three or four passes.
The Altenew Coastal Mist Fresh Dye Ink Bundle is a well-regarded example of a dye ink bundle suited to background and blending work. The range includes coordinated shades designed to layer without muddying. That coordination removes the trial and error of mixing unrelated ink colours.
Dye inks dry quickly on smooth cardstock, which matters when you are stamping a background before adding a sentiment on top. Slow-drying inks cause smearing when you add the second layer too soon.
6. Practical tools and accessories that protect your stamps
The right accessories extend the life of your stamps and improve the quality of every impression. The table below covers the four most useful tools and what each one does.
| Tool | Purpose | Why it matters |
|---|---|---|
| Stamp tongs | Handle stamps without skin contact | Oils from fingers degrade rubber and photopolymer over time |
| 10x loupe | Inspect fine stamp details and watermarks | Helps identify fine detail and check impression quality |
| Acrylic blocks (set of sizes) | Mount clear stamps for controlled pressure | Matched block size reduces misalignment |
| Storage mounts | Preserve unmounted stamps flat and clean | Mounts for mint stamps balance preservation and cost |
Stamp tongs and a 10x loupe are critical starter tools because they prevent the two most common forms of damage: oil transfer and undetected impression flaws. A loupe also helps you spot when a stamp’s detail is wearing down before the quality drop shows up on your finished cards.
Storage is the most neglected part of stamp care. Rubber stamps stored face-down on a hard surface develop flat spots over time. Storing them upright in a dedicated drawer or on a mounted board keeps the relief intact and makes selection faster during a crafting session.
7. Themed stamp sets: why series-based collecting beats random buying
Themed stamp sets produce better results than random single-stamp purchases because every element shares a visual style. A botanical series, for example, will include leaves, stems, and flowers at a consistent scale. You can combine any two stamps from the set and they will look as though they belong together.
Postal-inspired stamp designs are a particularly strong theme for hobbyists interested in stamp design trends because they reference a familiar visual language. Postmarks, cancellation marks, and vintage envelope motifs translate naturally into card making, journalling, and mixed media projects.
Buying in series also gives you a clear collecting framework. You complete a set rather than accumulating unrelated stamps that never quite work together. That discipline keeps your kit manageable and your results consistent.
8. Beginner-friendly stamp sets to start with
The best entry point for a new hobbyist is a clear photopolymer set that includes both a background texture stamp and a coordinating sentiment. That combination covers the two most common card-making needs in a single purchase. You can produce a finished card with just those two stamps, an ink pad, and an acrylic block.
A small geometric or floral motif stamp is the next logical addition. It gives you the building block for frame and grid layouts described earlier. A beginner’s approach to stamp design that starts with simple shapes and scales up to detailed imagery is the most reliable path to consistent results.
Avoid buying large, highly detailed stamps before you have mastered pressure and ink coverage. Detail stamps are unforgiving of uneven pressure, and the results can be discouraging early on.
9. How stamp layout techniques improve every project
Layout planning before you stamp is the single habit that separates polished results from cluttered ones. A stamp layout guide approach applies as much to hobbyist card making as it does to business branding. The principles are the same: balance, white space, and a clear focal point.
The most common layout mistake is centring every element. Off-centre placement with deliberate white space reads as more considered and contemporary. Stamp your focal image slightly above centre, then anchor it with a sentiment below.
Batch stamping the same layout across multiple cards is the most efficient use of a single session. Stamp all backgrounds first, then all focal images, then all sentiments. This assembly-line approach keeps your ink coverage consistent and reduces set-up time.
10. Personalised stamps as a creative and practical addition
Personalised stamps serve a dual purpose for hobbyists. They add a professional finishing touch to handmade projects and function as practical tools for packaging, labelling, and correspondence. A custom logo or address stamp turns a plain envelope into a branded piece of mail art.
The practical uses for personalised stamps extend well beyond business applications. Hobbyists use them to mark handmade items, personalise gift wrapping, and create consistent branding across an Etsy shop or craft fair stall. A single well-designed personalised stamp earns its cost quickly across those applications.
Self-inking personalised stamps are the most practical format for high-frequency use. They re-ink automatically, produce consistent impressions, and require no separate ink pad.
Key takeaways
The most effective rubber stamping kit combines clear photopolymer stamps, matched acrylic blocks, embossing supplies, and practical accessories like tongs and a loupe.
| Point | Details |
|---|---|
| Clear stamps lead every kit | Photopolymer stamps offer precision placement and work without adhesive on acrylic blocks. |
| Match block size to stamp | Correctly sized acrylic blocks distribute pressure evenly and reduce misalignment. |
| Anti-static tool is non-negotiable | Using an anti-static tool before embossing prevents stray powder and improves finish quality. |
| Small stamps build big layouts | Frames, grids, and focal shapes turn individual motifs into cohesive, professional compositions. |
| Themed sets outperform random buying | Series-based stamp collections produce consistent visual results and a manageable kit. |
What I have learned from years of stamping
The advice I wish someone had given me early on is simple: buy fewer stamps and better tools. Most beginners do the opposite. They accumulate stamps quickly and then wonder why their results look inconsistent. The answer is almost always the acrylic block, the ink pad, or the storage method, not the stamp itself.
The embossing section of any hobbyist’s kit is where the biggest quality gap appears between those who read the technique properly and those who do not. Heating from underneath the card, preheating the tool, and stopping at the glossy stage are not optional refinements. They are the difference between a raised, crisp finish and a bubbled, dull one. I have seen hobbyists blame their powder or their stamps when the issue was simply that they were heating from above.
Themed stamp sets changed how I approach a crafting session. When every stamp in a set shares a visual language, the layout decisions become much easier. You stop asking “does this go with that?” and start asking “where does this go?” That is a more productive creative question.
The one thing most stamping guides skip is the loupe. Inspecting your stamps under magnification before and after use tells you things you cannot see with the naked eye. Worn detail, ink residue in fine lines, and surface damage all show up clearly. Catching those issues early extends the life of your stamps considerably.
— Steven
Stampdesign4u: personalised rubber stamps for hobbyists
Stampdesign4u offers a wide range of personalised rubber stamps suited to hobbyists who want to add a custom element to their crafting projects.
The Trodat Printy 4927 is a versatile nine-line rubber stamp at 60 x 40mm, well suited to logo and text impressions for packaging and correspondence. For hobbyists focused on custom packaging, the personalised packaging stamps collection covers a range of sizes and formats. Stampdesign4u ships internationally and provides a straightforward ordering process, making it a practical option for hobbyists who want quality personalised stamps without a lengthy lead time.
FAQ
What stamps should a beginner buy first?
A clear photopolymer set with a background texture stamp and a coordinating sentiment is the best starting point. Add a small geometric or floral motif stamp as your second purchase to build layout flexibility.
Do I need an acrylic block for clear stamps?
Clear stamps require an acrylic block to function correctly. Matching the block size to the stamp distributes pressure evenly and produces clean, complete impressions.
What is the most common embossing mistake?
Heating from above the powder rather than underneath the cardstock is the most common error. It causes warping and uneven melting. Preheat your heat tool and apply heat from the card’s reverse side for best results.
Are small stamps worth buying?
Small stamps are among the most useful in any collection. Used as frames, grids, or focal shapes, they produce complex layouts from a single motif and are ideal for batch crafting multiple cards in one session.
What is the difference between dye ink and embossing ink?
Dye ink is water-based and dries quickly on smooth cardstock, making it ideal for backgrounds and layering. Embossing ink, such as VersaMark, stays wet long enough for embossing powder to adhere before heat is applied.