

Stamps are a fast, repeatable way to personalise stationery, packaging, fabrics, and educational materials. A single rubber stamp can serve a crafter decorating journals, a small shop branding kraft boxes, or a teacher marking reward charts. The starting tip: match your ink to your surface before anything else. VersaFine or Archival ink for paper and card, StazOn solvent ink for glass or plastic, fabric-specific ink for cotton. A Trodat Printy self-inking stamp handles high-volume address work without re-inking; for one-off creative projects, a hand-mounted rubber stamp gives more control. Stampdesign4u supplies custom stamp designs across all these formats.
Surfaces straightforward to start with:
- Paper and card (most inks work)
- Kraft paper and brown parcel wrap
- Cotton tote bags (with fabric ink, heat-set after stamping)
Pro Tip: Test every new ink-and-surface combination on a scrap piece first. A test print on scrap saves more projects than any other single habit.
Table of Contents
- Ten stamping projects you can try this afternoon
- Essential supplies and how to choose the right stamp
- Core technique, common mistakes, and quick fixes
- How to carve simple custom stamps at home
- How small businesses use stamps for low-cost branding
- Key takeaways
- Stampdesign4u: custom stamps for craft and business use
Ten stamping projects you can try this afternoon
1. Personalised stationery
Stamp a monogram or simple motif onto writing paper, notecards, or envelopes. Use VersaFine pigment ink on smooth white card for sharp, fade-resistant results. You need a mounted rubber stamp, a pigment ink pad, and a small stack of blank cards.
Pro Tip: Stamp the envelope flap rather than the front for a subtle, professional finish.
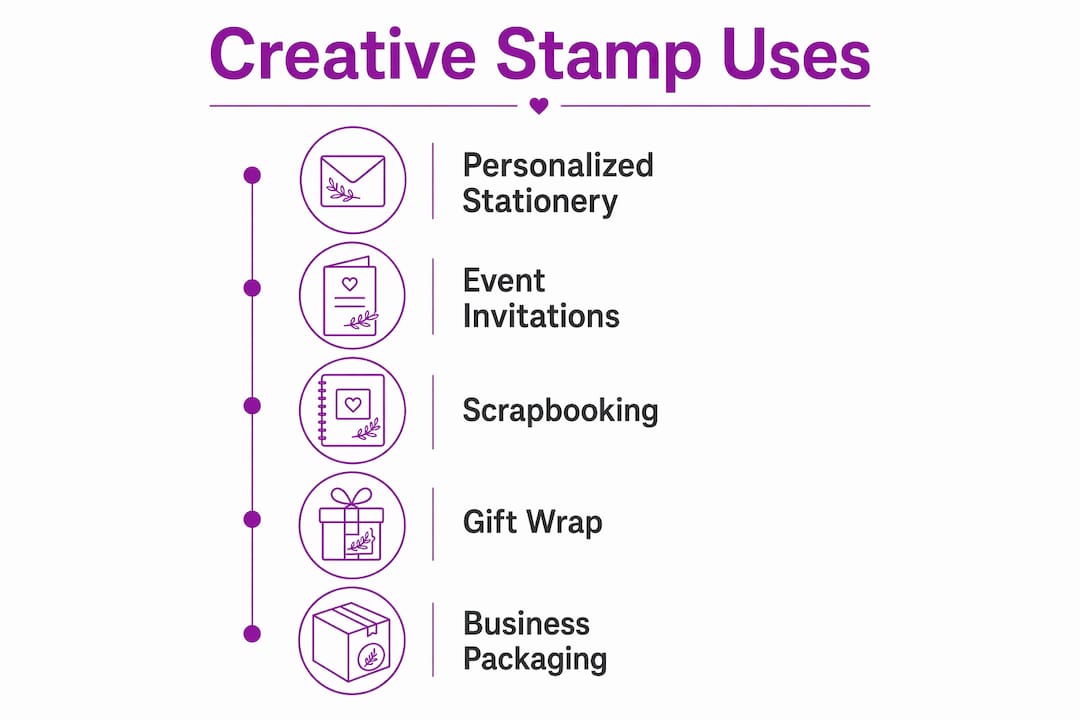
2. Event invitations and decorations
A botanical border or geometric repeat stamp transforms plain card into bespoke invitations. Dye ink dries fast on uncoated card, which matters when you are stamping fifty pieces. Add a second colour with a second stamp for a layered look.
3. Scrapbooking and journals
Clear photopolymer stamps are the practical choice here. Because you can see through them, precise placement on a busy page layout is straightforward, and layering two or three images without misalignment is achievable even for beginners.
4. Gift wrap and tags
Stamp a repeating pattern directly onto plain brown or white paper using a dye ink pad. For tags, kraft card with a black pigment stamp reads cleanly. One stamp, one ink pad, and a roll of plain paper replace an entire shelf of printed wrapping.
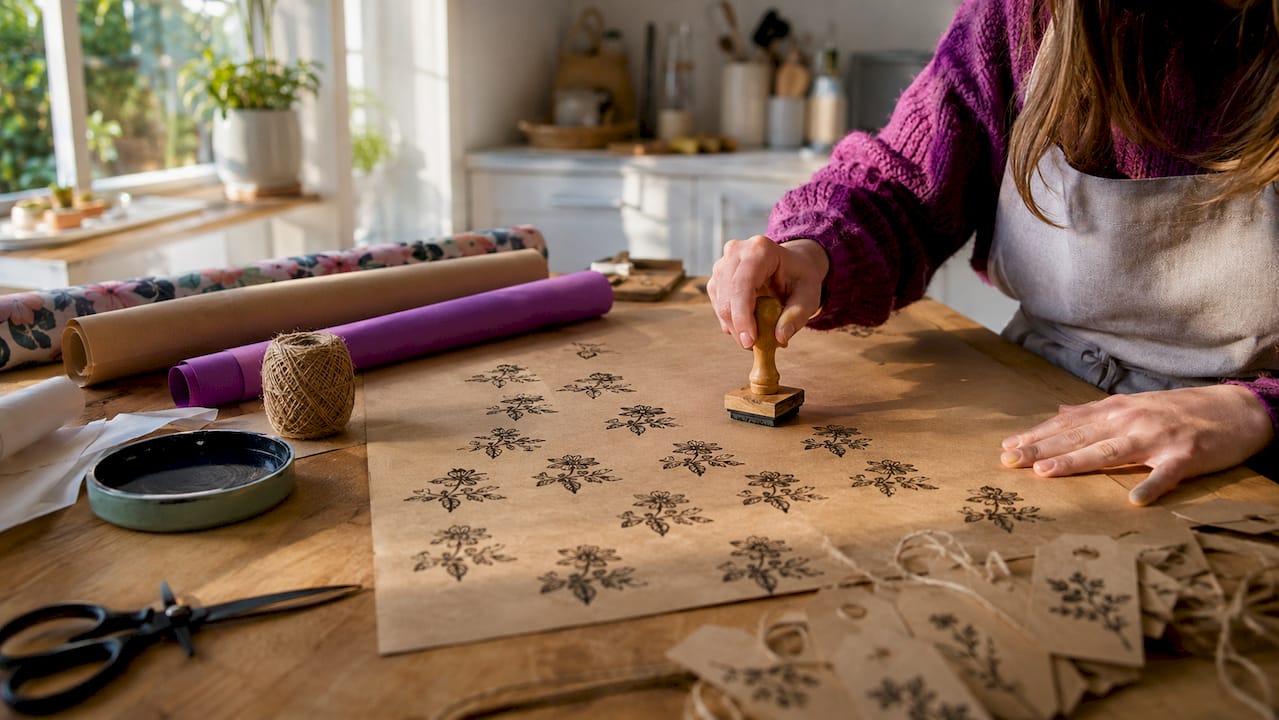
5. Small-business packaging and thank-you stamps
A logo stamp on tissue paper, boxes, or mailers gives packaging a consistent branded look without the cost of pre-printed stock. Pigment ink gives better opacity on dark kraft. Pair a logo stamp with a separate “Thank You” or “Handmade with care” stamp for a two-piece packaging kit. Stampdesign4u’s personalised packaging stamps are sized for exactly this use.
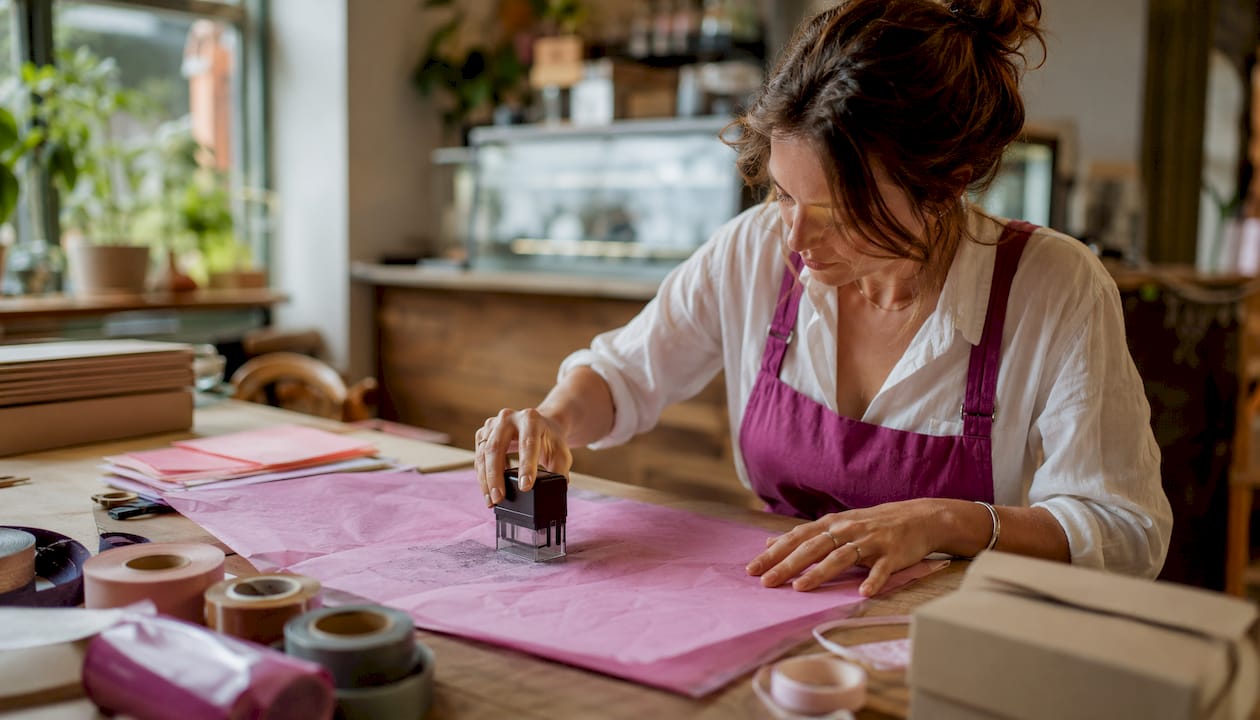
6. Product labelling and receipts
A Trodat Printy self-inking stamp is the practical choice for repetitive address, return, or “Paid” labelling. It re-inks automatically, produces consistent impressions, and handles hundreds of uses before needing a refill. For receipts or order slips, a date-and-address stamp cuts manual writing time significantly.
7. Educational tools and reward charts
Teachers use stamps for marking work, adding “Well done” or tick motifs to exercise books, and building reward charts. A dedicated teacher stamp with a tick or star design keeps feedback fast and consistent. Dye ink on paper dries quickly, which matters when marking a full class set.
8. Home décor prints and cushion covers
Stamp a geometric or floral repeat onto plain cotton fabric using fabric-specific ink, then heat-set with an iron to make it wash-resistant. The same approach works on plain canvas cushion covers. Fabric inks must be heat-set or the print will wash out; standard dye ink is not suitable for textiles.
9. Seasonal and kids’ crafts
Christmas tags, advent calendar labels, and gift bags all benefit from a simple seasonal stamp. Children can stamp their own wrapping paper using bold, simple designs and washable dye ink. Keep the stamp design bold and the lines thick — fine detail is harder for small hands to register cleanly.
10. Organisational helpers
Storage box labels, inventory stamps, and library-style date stamps keep physical spaces ordered. A self-inking stamp with your address or a “Fragile” notice speeds up dispatch packing. For customer loyalty programmes, a small punch-card stamp is a low-cost, tactile alternative to digital loyalty apps.
Essential supplies and how to choose the right stamp
Stamp types
- Rubber on wood: traditional, versatile, good for detailed designs
- Self-inking (e.g. Trodat Printy): built-in ink pad, fast re-inking, suited to high-volume repetitive work
- Pre-inked: cleaner to handle, slower to re-ink, good for fine detail
- Clear photopolymer: see-through for precise placement, ideal for layering
- Carved block (lino or soft rubber): hand-cut, one-off or short-run use
Ink categories
- Dye ink: fast-drying, vivid on paper, not suitable for non-porous surfaces
- Pigment/Archival (e.g. VersaFine, Archival Ink): slow-drying, opaque, permanent on paper and card
- Fabric/textile ink: must be heat-set; wash-resistant once cured
- Solvent ink (e.g. StazOn): the only reliable choice for glass, plastic, metal, or coated surfaces — without solvent ink the print beads and never dries properly
Three questions before you buy
- What surface am I stamping on?
- How many impressions do I need per session?
- How much fine detail does the design require?
For large stamps where a standard pad is too small, a brayer roller gives even ink coverage across the full stamp face. A self-inking Trodat Printy suits address and return stamping; a pre-inked or carved block suits detailed, lower-volume creative work. See Stampdesign4u’s stamp type guide for a fuller breakdown.
Pro Tip: Always ink the stamp, not the pad — press the stamp face onto the pad rather than rubbing it back and forth, which loads ink unevenly.
Core technique, common mistakes, and quick fixes
Control and ink choice matter more than design complexity. A simple motif stamped with even pressure and the right ink outperforms an intricate design stamped carelessly.
Basic technique checklist
- Ink evenly: tap the stamp face onto the pad two or three times; do not rub
- Position the stamp precisely before pressing
- Press firmly and evenly across the whole stamp face
- Lift straight up — rocking or sliding is the most common beginner mistake and blurs edges immediately
Troubleshooting table
| Symptom | Likely cause | Quick fix |
|---|---|---|
| Smudged print | Ink too wet or stamp moved during lift | Use dye ink; lift vertically without sliding |
| Patchy impression | Uneven surface or insufficient ink | Place a stamping mat underneath; re-ink before each impression |
| Blurred edges | Rocking the stamp | Press straight down; hold still until fully lifted |
| Ink beading on surface | Wrong ink type for non-porous surface | Switch to StazOn solvent ink |
| Faded centre | Uneven pressure | Use a brayer for large stamps; press from the centre outward |
Pro Tip: When stamping on flexible items such as gift bags or pouches, insert a piece of thin chipboard or a slim wooden board inside to create a firm, flat backing. Partial or skewed impressions are almost always a surface-stability problem, not a stamp problem.
When cleaning stamps, avoid alcohol-based cleaners and baby wipes containing aloe — both dry rubber and degrade fine detail over time. Use a dedicated stamp cleaner or plain water with a soft cloth.
How to carve simple custom stamps at home
Carving your own stamp takes a moderate amount of time for a bold, simple design. The results suit lino-style motifs, repeat patterns, and experimental shapes where fine detail is not the priority.
What you need
- Soft rubber carving block or lino sheet
- Precision craft knife and carving gouges (V-gouge and U-gouge)
- Cutting mat
- Pencil and tracing paper
Step-by-step
- Draw or print your design, then transfer it to the block face using tracing paper and a pencil.
- Outline the design with a precision knife, cutting just outside the drawn lines.
- Remove the negative space (the areas that should not print) using a U-gouge for larger areas and a V-gouge for fine lines.
- Press the block onto a scrap piece of paper and check the impression. Mark any areas that need more material removed.
- Refine incrementally — remove a little at a time and test after each pass.
Soft rubber carving blocks are the recommended starting material for beginners; they cut cleanly and forgive small errors better than harder lino.
Safety: always cut away from your hands and keep fingers behind the blade. Use a cutting mat, not a free hand, as a backing.
When to buy instead of carve: fine-detail logos, text, or any design requiring consistent reproduction across hundreds of impressions are better ordered as a custom stamp. Carving suits bold graphics and one-off creative projects.
Pro Tip: Store carved blocks flat, face-up, away from direct sunlight. Stacking them face-down under weight distorts the relief over time.
How small businesses use stamps for low-cost branding
Custom stamps are an affordable branding asset for small runs of packaging, tags, and receipts. One logo stamp can replace costly pre-printed packaging for many sellers, and the per-impression cost drops sharply after the first few dozen uses.
A practical workflow for small businesses:
- Design one logo stamp sized to fit your standard box or mailer (60 x 40mm covers most uses)
- Add a secondary stamp for “Thank You”, “Fragile”, or a short URL
- Choose ink by surface: pigment ink for opacity on kraft; dye ink for speed on white card
- Set up a stamping station: flat surface, stamping mat, ink pad, damp cloth for quick cleaning between colours
- Batch stamp packaging in one session to keep the workflow consistent
For small-business branding, a Trodat Printy self-inking stamp handles address and return labelling at volume. For logo work on packaging, a larger pre-inked or custom rubber stamp gives better detail. Plan ink refills based on your typical weekly dispatch volume — most self-inking pads last several hundred impressions before the print noticeably fades.
Key takeaways
Matching ink to surface is the single most important decision in any stamping project; everything else follows from getting that right.
| Point | Details |
|---|---|
| Ink-to-surface match | Use StazOn for non-porous surfaces, fabric ink (heat-set) for textiles, pigment or dye for paper. |
| Press and lift technique | Press firmly and evenly, then lift straight up — rocking or sliding blurs every impression. |
| Test on scrap first | A test print on scrap paper catches ink and pressure problems before they reach the final surface. |
| Choose stamp type by volume | Self-inking (Trodat Printy) for high-volume repetitive work; carved or pre-inked for detailed, lower-volume projects. |
| Stampdesign4u for custom needs | Stampdesign4u supplies personalised logo, packaging, and self-inking stamps suited to both craft and small-business use. |
Why stamps still hold their place
Stamps occupy a practical niche that digital tools have not displaced. A branded kraft box stamped with a logo and a “Thank You” message takes seconds to produce and costs a fraction of printed packaging. For a small seller dispatching multiple orders each week, that consistency adds up to a recognisable customer experience without a design agency or a print run minimum.
The craft side is equally straightforward. A clear photopolymer stamp on a scrapbook page, a lino-carved motif on gift wrap, a fabric stamp heat-set onto a tote bag — none of these require specialist equipment or long preparation. The barrier is low. The results are repeatable. What most beginners underestimate is how much technique matters relative to the stamp itself. Even pressure, the right ink, and a straight lift produce clean results from an inexpensive stamp. The reverse is also true: a premium stamp used with the wrong ink on the wrong surface produces a poor impression every time.
The practical conclusion is to start with ink choice, not stamp choice. Get that right and the rest follows quickly.
Stampdesign4u: custom stamps for craft and business use
Stampdesign4u offers a direct route from project idea to finished stamp, with no minimum order and a range covering everything from personalised logo stamps to self-inking Trodat Printy models. For small businesses, the personalised logo stamp collection covers the most common branding needs: box and mailer logos, return address stamps, and thank-you designs. For packaging specifically, the personalised packaging stamps range includes sizes suited to tissue paper, kraft boxes, and mailer bags.
For high-volume address or return stamping, the Trodat Printy 4927 (60 x 40mm, nine-line capacity) is the practical self-inking option — it re-inks automatically and handles consistent daily use without fuss. Crafters and educators will find the personalised stamps range covers one-off and short-run projects equally well. Browse the full range at Stampdesign4u and select the stamp type that fits your surface, volume, and design.
Further reading and useful links
- How to stamp on any surface — Stampty: detailed ink-to-surface guidance including solvent inks and brayer technique for large stamps.
- How to properly use rubber stamps — Printable Press: clear beginner technique guide covering pressure, lift, and common errors.
- How to clean rubber stamps — The Spruce Crafts: practical cleaning and care advice, including which products to avoid.
- How to make rubber stamps for beginners — Excel Blades: step-by-step carving guide with tool recommendations for soft rubber and lino.
-
: short video demonstrating placement and masking techniques for photopolymer stamps.
- Stampdesign4u stamp type guide: practical advice on matching stamp type to project requirements.
- Stampdesign4u small business stamps: full range of branding and packaging stamps for UK businesses.