
TL;DR:
- Branding consistency is a major challenge for small businesses managing physical materials on a budget. Custom logo stamps provide a cost-effective, reusable solution to reinforce brand identity across various surfaces. Proper material selection, technique, and centralized governance are essential for scalable, professional stamp-based branding efforts.
Branding consistency is one of the biggest headaches for small businesses managing physical and promotional materials on a budget. Printed packaging runs carry high minimum orders, outsourced design work adds cost, and manual workflows create visible inconsistencies that erode trust. As VistaPrint notes, custom logo stamps offer a cost-effective, reusable branding touchpoint on packaging, envelopes, and cards, reinforcing brand identity across every physical interaction. This guide walks you through everything needed to select, apply, troubleshoot, and scale stamp-based branding for your business.
Table of Contents
- What you need to enhance your branding with stamps
- Step-by-step guide to stamping for enhanced branding
- Troubleshooting and avoiding common mistakes
- Verifying and scaling your brand enhancement efforts
- Our perspective: rethinking stamp branding for small businesses
- Discover stamp solutions for your branding needs
- Frequently asked questions
Key Takeaways
| Point | Details |
|---|---|
| Cost-effective branding tool | Custom stamps deliver consistent branding across packaging and materials without high upfront print costs. |
| On-demand workflow reduces waste | Stamping enables businesses to brand plain stock as needed, reducing unused inventory and minimum order constraints. |
| Technique matters | Proper ink selection and application methods are crucial for quality impressions and avoiding errors. |
| Scale across physical and digital | Branding with stamps can unify your identity across packaging, promotions, and digital assets with central management. |
| Prevent inconsistency with templates | Governed, templated workflows avoid branding errors when multiple team members use stamps for business collateral. |
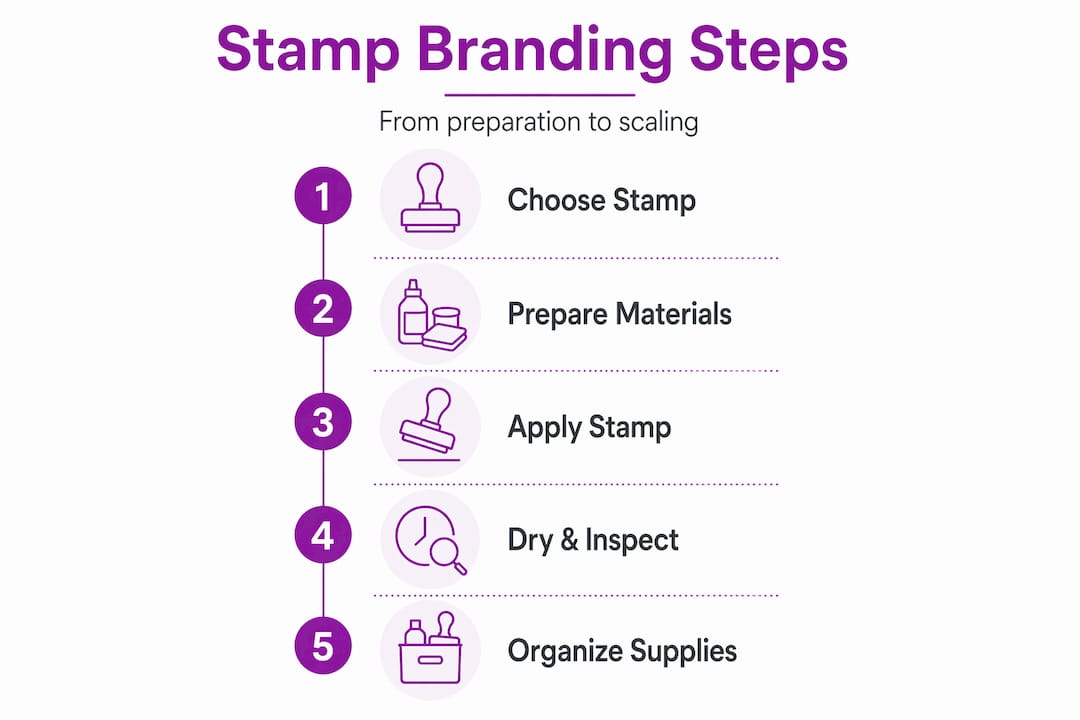
What you need to enhance your branding with stamps
With the branding challenge in mind, start by gathering all the necessary materials and prerequisites to ensure professional stamp impressions from day one.
Before applying a single impression, you need the right combination of stamp type, ink, and surface material. Cutting corners at this stage leads to faded logos, uneven coverage, and wasted stock. Getting this setup correct means every stamped item looks deliberate and professional rather than rushed.
Stamp types to consider:
- Self-inking stamps: Built-in ink pads that re-ink automatically. Ideal for high-volume use such as envelopes and order slips.
- Pre-inked stamps: Ink is embedded in the die itself, producing sharper detail. Suited to logo-heavy designs with fine lines.
- Traditional rubber stamps: Require a separate ink pad. More flexible in terms of ink colour swapping.
- Photopolymer stamps: Clear material, great for precise placement on cards and craft packaging.
You can explore a full range of custom logo stamps for business to understand which format suits your volume and surface requirements before ordering.
Ink types at a glance:
| Ink type | Best for | Drying speed | Fade resistance |
|---|---|---|---|
| Dye ink | Paper, envelopes | Fast | Moderate |
| Pigment ink | Cardstock, kraft paper | Slower | High |
| Solvent ink | Plastic, glass, metal | Medium | Very high |
| Chalk ink | Porous and dark surfaces | Fast | High |
Surfaces commonly used for stamp branding:
- Kraft paper bags and postal envelopes
- Cardboard packaging boxes and inserts
- Thank-you cards and loyalty cards
- Tissue paper and product wrapping
- Plain cotton tote bags (with fabric ink)
One of the most practical advantages of stamp-based branding is the ability to buy unbranded materials in bulk and stamp them as needed. According to Smartbag’s research, stamped packaging reduces upfront cost and wasted outdated inventory compared to custom-printed packaging runs with high minimums. This on-demand approach is particularly useful when your logo, address, or promotional message changes seasonally.
For teams managing multiple brand assets, consider keeping a centralised stock of ink pads and stamp designs in one location. This prevents individual team members sourcing their own supplies and producing off-brand results. Practical branding stamp tips around asset management will save time and maintain consistency as you grow.

Pro Tip: Label each ink pad with the stamp it corresponds to. When multiple people use the same stamp station, this prevents cross-contamination between ink colours and maintains colour accuracy across every impression.
Step-by-step guide to stamping for enhanced branding
Once materials and tools are ready, the next step involves mastering the stamping process to achieve crisp, consistent impressions every time.
Technique matters more than most business owners expect. An excellent stamp design applied incorrectly produces blurry or patchy results that undermine the professional image you are trying to build. Follow these steps carefully.
-
Prepare your surface. Ensure the stamping surface is clean, dry, and flat. Any dust, grease, or moisture on kraft paper or cardstock will cause ink to bead or spread unevenly. Use a firm backing beneath flexible materials such as tissue paper.
-
Select the correct ink for the material. Refer to the comparison table above. Dye inks work quickly on smooth paper but bleed on porous surfaces. Pigment inks take longer to dry but produce bold, fade-resistant impressions on cardstock. Solvent inks are necessary for non-porous surfaces like plastic packaging.
-
Ink the stamp evenly. Press the stamp gently onto the ink pad two to three times using light, even contact. Avoid rocking the stamp side to side, which loads ink unevenly. For large stamps, a foam brayer or roller achieves more even ink coverage than a standard pad.
-
Apply the stamp with firm, even pressure. Position the stamp over the surface, then press straight down without sliding. Hold for three to five seconds. Sliding even slightly causes a ghost impression alongside the main image.
-
Lift straight up. Pull the stamp directly upward, not at an angle. Angled lifts drag the inked design and create smears.
-
Allow adequate drying time. Dye ink on smooth paper may dry within thirty seconds. Pigment ink on thick cardstock may need two to four minutes. Do not stack or handle stamped materials until fully dry.
Surface and technique quick reference:
| Surface | Recommended ink | Technique note | Approximate drying time |
|---|---|---|---|
| Smooth paper | Dye | Standard pad | 30 to 60 seconds |
| Kraft cardstock | Pigment | Brayer for large stamps | 2 to 4 minutes |
| Corrugated card | Pigment or solvent | Extra pressure | 3 to 5 minutes |
| Fabric | Fabric ink | Iron to set after drying | 10 minutes plus heat |
| Plastic surface | Solvent | Minimal pressure, hold longer | 2 to 3 minutes |
The uses of branding stamps extend well beyond envelopes. Once you master the basic technique, apply it to thank-you card inserts, product tags, loyalty cards, and seasonal packaging without any additional design costs.
For a broader overview of stamping techniques across different branding scenarios, the complete custom stamp guide covers additional surface types and specialist ink combinations.
Pro Tip: Keep a test sheet of the same material as your actual packaging beside your stamp station. Always make one test impression before stamping a batch. This takes ten seconds and eliminates an entire batch of off-brand results.
Troubleshooting and avoiding common mistakes
Perfect technique does not always happen on the first try. Here are the most effective ways to troubleshoot and avoid typical stamping pitfalls before they affect a full production run.
Common problems and their causes:
- Patchy or faded impressions: Ink pad is drying out or insufficient ink was applied. Re-ink the pad or apply more passes before stamping.
- Bleed or smear on the edges: Too much ink, too much pressure, or the surface is slightly damp or oily. Reduce ink loading and ensure the surface is fully dry.
- Ghost impressions (double image): The stamp moved laterally during application. Press straight down and hold without any horizontal movement.
- Ink not adhering to surface: Wrong ink type for the material. Plastic or coated surfaces need solvent or alcohol-based ink, not standard dye ink.
- Uneven coverage on large stamps: Standard ink pads cannot always cover a large stamp die evenly. Switch to a foam brayer for complete, consistent coverage.
The most common mistake in stamp branding is applying too much pressure on detailed designs. Excess pressure pushes ink into fine spaces within the design, causing lines to merge and logos to appear as solid blobs rather than crisp marks. Use firm but controlled pressure.
Stampty’s technique guidance recommends holding the stamp for several seconds, particularly on porous or recessed surfaces, and lifting straight up before allowing the impression to dry fully before handling.
For detailed designs with fine lines or small text, pre-inked stamps generally perform better than traditional rubber stamps because the ink distribution is more uniform and controlled from within the die itself.
Surface compatibility is the most overlooked factor in stamp branding. Many small businesses assume any stamp works on any surface. It does not. Testing ink and surface combinations on scrap material first prevents wasted stock and inconsistent outputs across a product range.
You can find a structured approach to avoiding these issues in the custom stamp best practices guide, which covers edge cases like glossy coated card and recycled kraft materials with variable absorbency. Understanding why stamp branding matters for your overall brand identity also helps frame these decisions within a wider marketing context.
Pro Tip: Store ink pads face down in a sealed container between uses. This keeps the pad surface moist and evenly saturated, extending pad life significantly and producing more consistent impressions over a longer period.
Verifying and scaling your brand enhancement efforts
After mastering technique and troubleshooting errors, it is time to verify your outputs and introduce practical governance for scaling consistent brand impressions across your operation.
Quality verification checklist:
- Hold each stamped item at arm’s length under natural light. Lines should be sharp, colours consistent, and coverage complete.
- Compare stamped items produced by different team members side by side. Variation in pressure or ink loading will be immediately visible.
- Photograph a reference impression at the start of each production session. Use it as a benchmark throughout that session.
- Check that ink colour matches your brand specification. Ink pads fade over time and may shift slightly in hue as they age.
- Review a sample from every new batch of stamping materials, as surface absorbency can vary between paper manufacturers or batches.
Scaling stamp-based branding requires more than buying extra pads. It requires clear written protocols covering which stamp to use on which material, which ink colour matches your brand, and how long to wait before packing items. Without these protocols, different team members produce different results, and your brand identity fragments across every customer touchpoint.
This issue appears in digital branding too. A centralised brand governance approach enabled consistent, on-brand email signatures at scale after a business discovered that individual employees were creating inconsistent versions without a central template. The same logic applies directly to physical stamp branding across a team.
Connecting physical and digital branding also creates leverage. Scan a reference impression of your stamp design and use it in email signature graphics, digital letterheads, or social media packaging photography. This creates visual continuity between your physical packaging and your digital presence without additional design investment.
For workplace stamp design applied across teams, creating a stamp design workflow document ensures new team members can replicate the process without retraining each time. Pairing this with customer retention strategies that prioritise consistent brand touchpoints shows how coherent physical branding contributes directly to long-term customer loyalty.
Scaling priority order:
- Document your current technique and ink specifications.
- Create a central stamp storage area accessible to all relevant team members.
- Produce a one-page reference guide with photos of acceptable versus unacceptable impressions.
- Review stamped outputs weekly until consistency is established.
- Expand to new surfaces or stamp designs only after baseline consistency is achieved.
Our perspective: rethinking stamp branding for small businesses
Most guidance on stamp branding focuses entirely on technique. Very little addresses the governance problem that emerges when more than one person uses stamps regularly.
The reality is straightforward. A single business owner stamping fifty envelopes produces consistent results through repetition and personal attention. A team of three people sharing two stamps and a rotating ink pad produces three noticeably different results. Customers cannot see who applied the stamp, but they do notice when the logo looks different on their second order than on their first.
WiseStamp’s Firma case study illustrates this precisely in the digital context, where inconsistent email signatures across a team created a blind spot in brand governance until centralised templates resolved the issue. The analogue equivalent in stamp branding is exactly the same problem, just less visible until a customer or client points it out.
Our view is that the missing piece for most small businesses is not a better stamp or a higher quality ink pad. It is a ten-minute governance conversation that results in one written protocol, one reference image, and one central location for supplies. This single intervention scales better than any individual technique improvement.
The multi-design stamping advice available for businesses using several stamp designs simultaneously makes this governance challenge even more relevant. When you add seasonal stamps, promotional stamps, and address stamps into a shared workflow, the need for clear labelling and documented protocols becomes critical rather than optional.
Physical and digital branding are converging for small businesses. Custom stamps are not a purely offline tool anymore. They feed into product photography, unboxing content, and brand storytelling across social platforms. Treating stamp branding as a professional, governed process rather than a casual add-on reflects that reality accurately.
Discover stamp solutions for your branding needs
If you are ready to apply these branding enhancement techniques, a range of custom stamp products is available to streamline your efforts immediately.

For businesses needing a versatile stamp that handles both logo artwork and multiple lines of contact or promotional text, the logo and text rubber stamp offers a 60 x 40mm format with up to nine lines of customisation. For retail and hospitality businesses building repeat customer programmes, the loyalty stamp recycle provides a compact, sustainable option that reinforces brand identity at every customer interaction. Both products are available through stampdesign4u.co.uk, with design support and international delivery options to suit businesses of all sizes.
Frequently asked questions
What surfaces can I use custom stamps on for branding?
Custom stamps work on packaging, envelopes, cards, plain bags, and most porous surfaces, provided you match the ink type to the surface material correctly for proper adhesion and drying.
How do I avoid smudges when using stamps for branding?
Apply even pressure without lateral movement, allow several seconds dwell time before lifting straight up, and wait for the impression to dry fully before stacking or handling the stamped materials.
Can custom stamps enhance both physical and digital branding?
Yes, stamps deliver cost-effective branding on physical packaging and can be integrated into digital brand elements such as email signatures or product photography to maintain consistent brand presence across all channels.
What ink type should I use with my custom stamp for branding?
Choose dye ink for fast-drying requirements on smooth paper, or opt for pigment ink for bolder, fade-resistant impressions on cardstock and kraft materials, matching the selection to your specific surface and production volume.